How to get up and running with Messenger Apps using ngrok
Back in April, we released our biggest ever update to our Messenger – we completely rethought how a messenger designed for business should work.
One of the key developments was Messenger Apps, integrations with third-party apps and tools you use everyday. These are built right into the Intercom Messenger and can be installed from our Intercom App Store, or you can build them yourself. This gives you the power to integrate and build the most important tools for your workflow, making the Messenger extremely customizable.
Simplify your app development process
One tool we and the developers over on our community forum found really useful when developing Messenger Apps was ngrok. This simple tool allows you to create public URLs, which expose a web server on your development machine. You can use these to set the webhook URLs while developing your app. This makes the development process really lightweight, since you can play around by building an app without any additional infrastructure, such as access to an external server. This can dramatically speed up the process of starting to build Messenger Apps.
Get started with ngrok
If you want to get started straight away, you can download ngrok here. I’ve included a simple example node server for you to copy as a starting point.
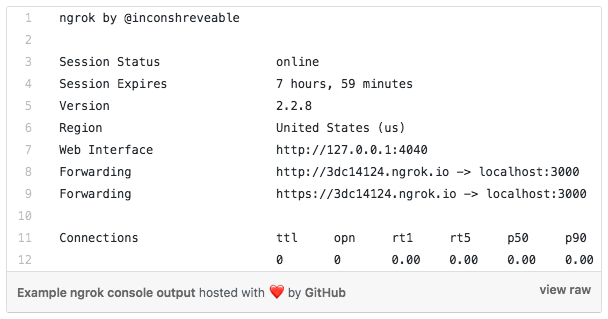
To begin, you’ll need to tell ngrok which port your server is listening on. My server is listening on port 3000, so I would run the command:
$ ngrok http 3000
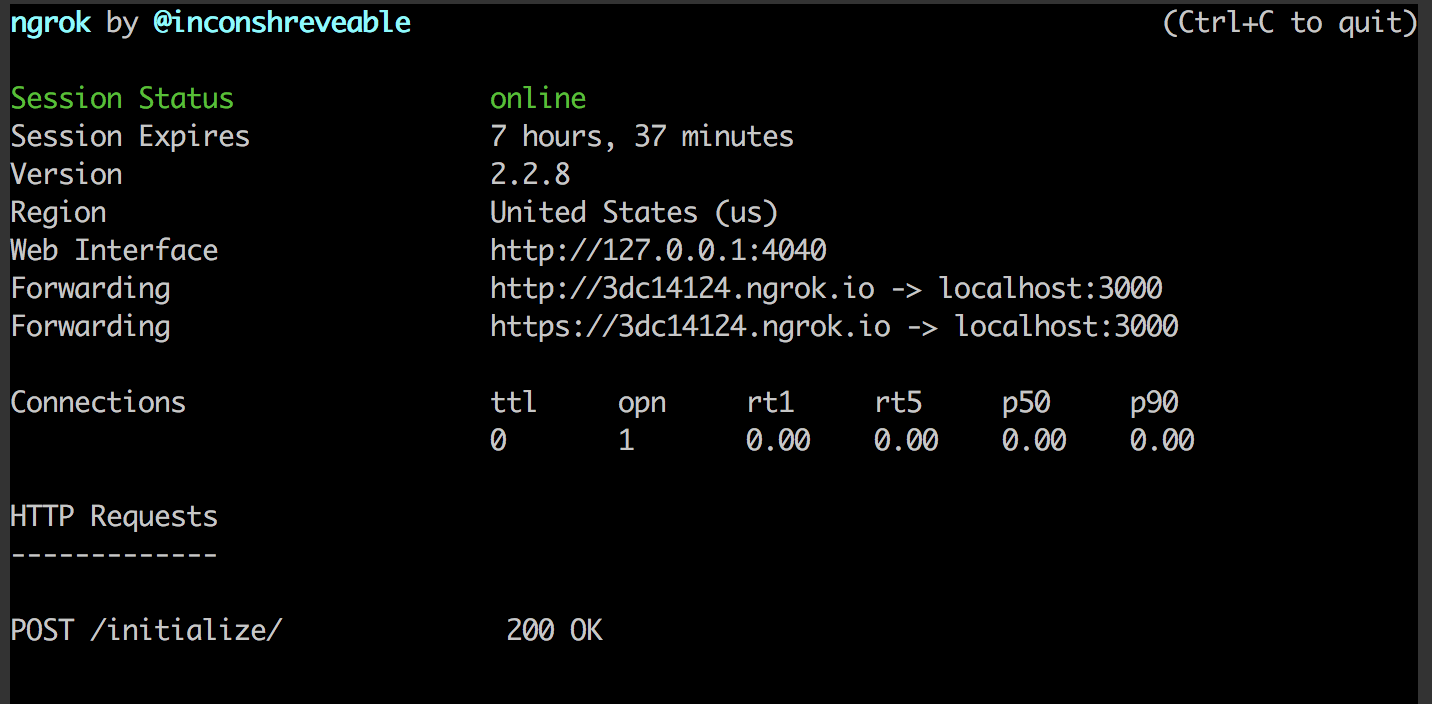
You should then see something like:
There’s a bunch of things happening here, so let’s break it down.
- Session Status and Session Expires – ngrok limits your sessions to eight hours on the free version. You can pay to get longer sessions.
- Version – the version of ngrok you are running
- Region – the location of the datacenter where your tunnel is being hosted
- Web Interface – Open this URL in a browser to see the extremely useful UI mentioned in the tips below.
- Forwarding – the public URLs which point to your machine
At this point, you have a tunnel to your server. This is useful on its own, as it means your development server is exposed to the outside world. Try making requests to your tunnel URLs – you will see that they hit your local server.
Note: You don’t need to stop ngrok when you’re stopping & starting your server. It’s just pointing to a port; it doesn’t notice whether or not something is listening there. The free version of ngrok will generate a new address each time you run it, so it’s often easier to just leave it running. You can easily update the URL in the Developer Hub if you do generate a new URL.
Three things I found really useful
1. Inspecting traffic using the web interface
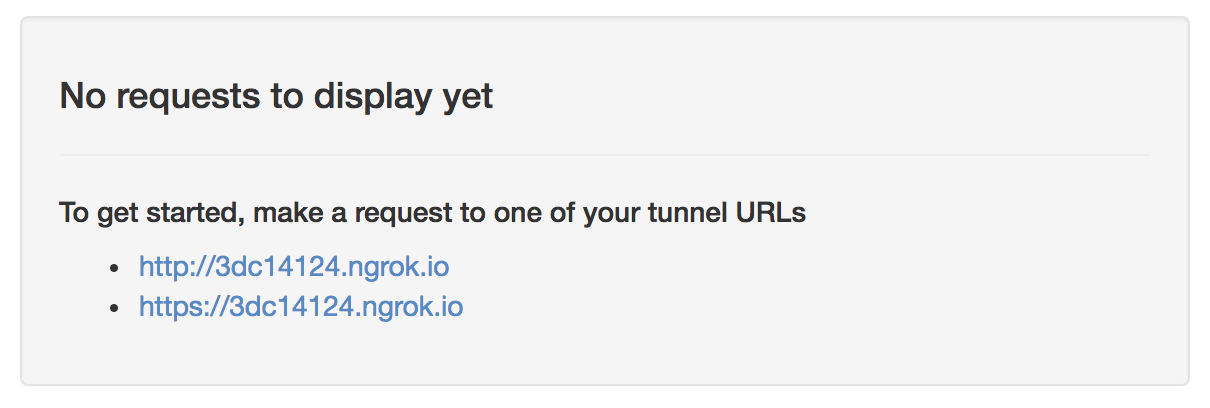
Using the web interface mentioned above (accessible at http://localhost:4040), you can do some really useful things. You’ll need to make some requests first, or else you’ll just see this:
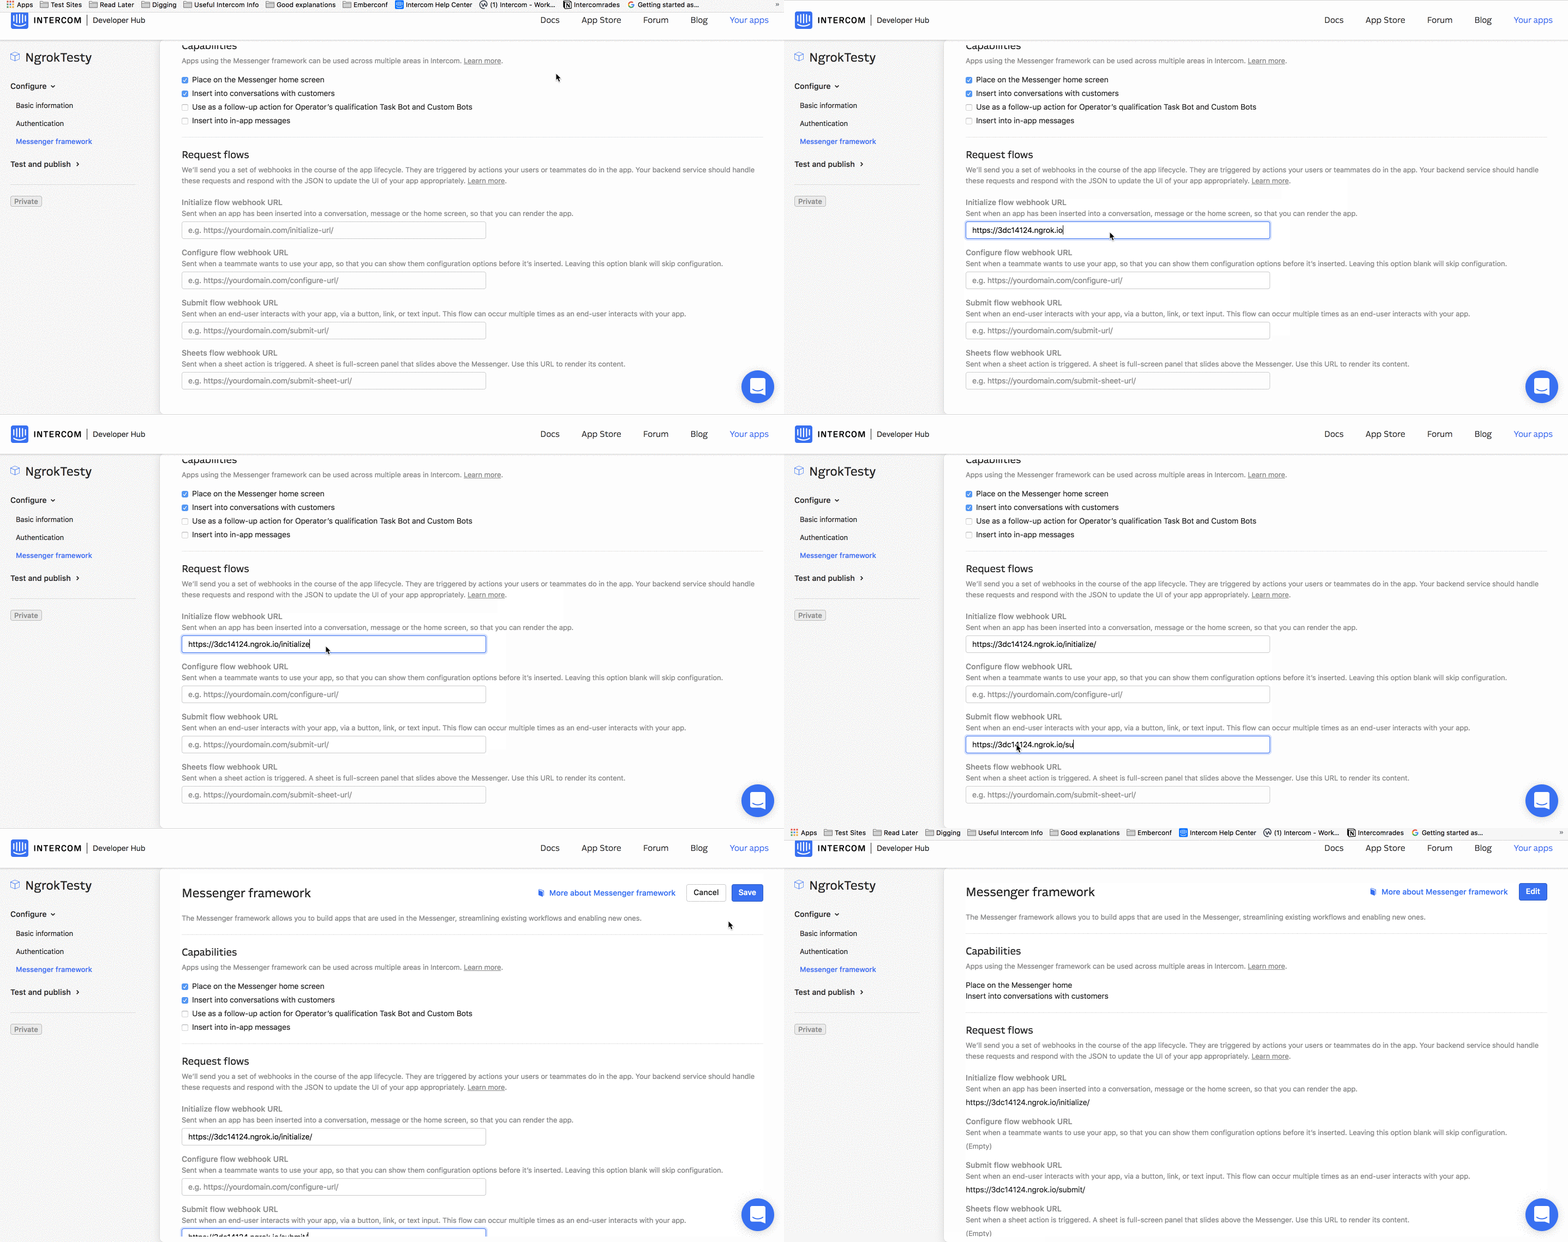
My server (Gist here) has two endpoints /initialize and /submit so I’ll go ahead and save those in the Developer Hub:
Now I’ll make a request to the /initialize endpoint by adding my app to my Messenger Home:
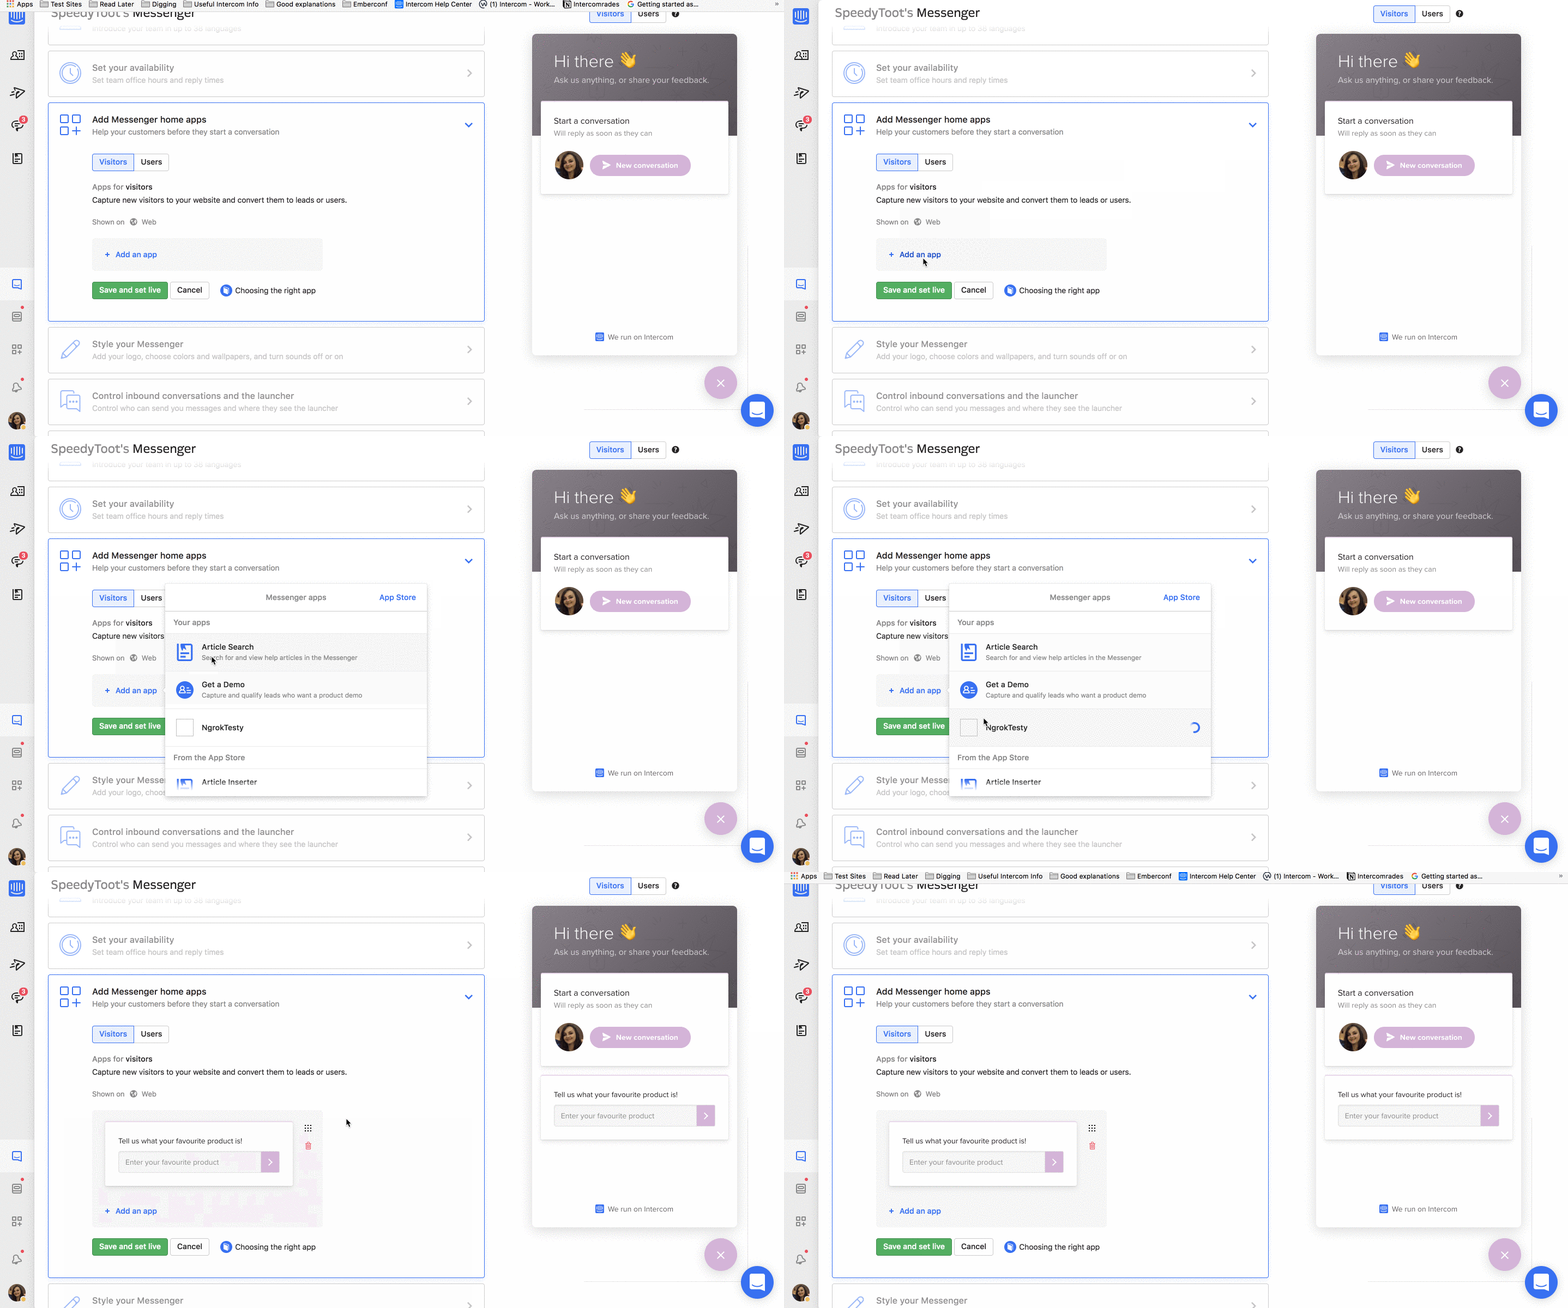
As you can see, this resulted in a POST request to my /initialize endpoint:
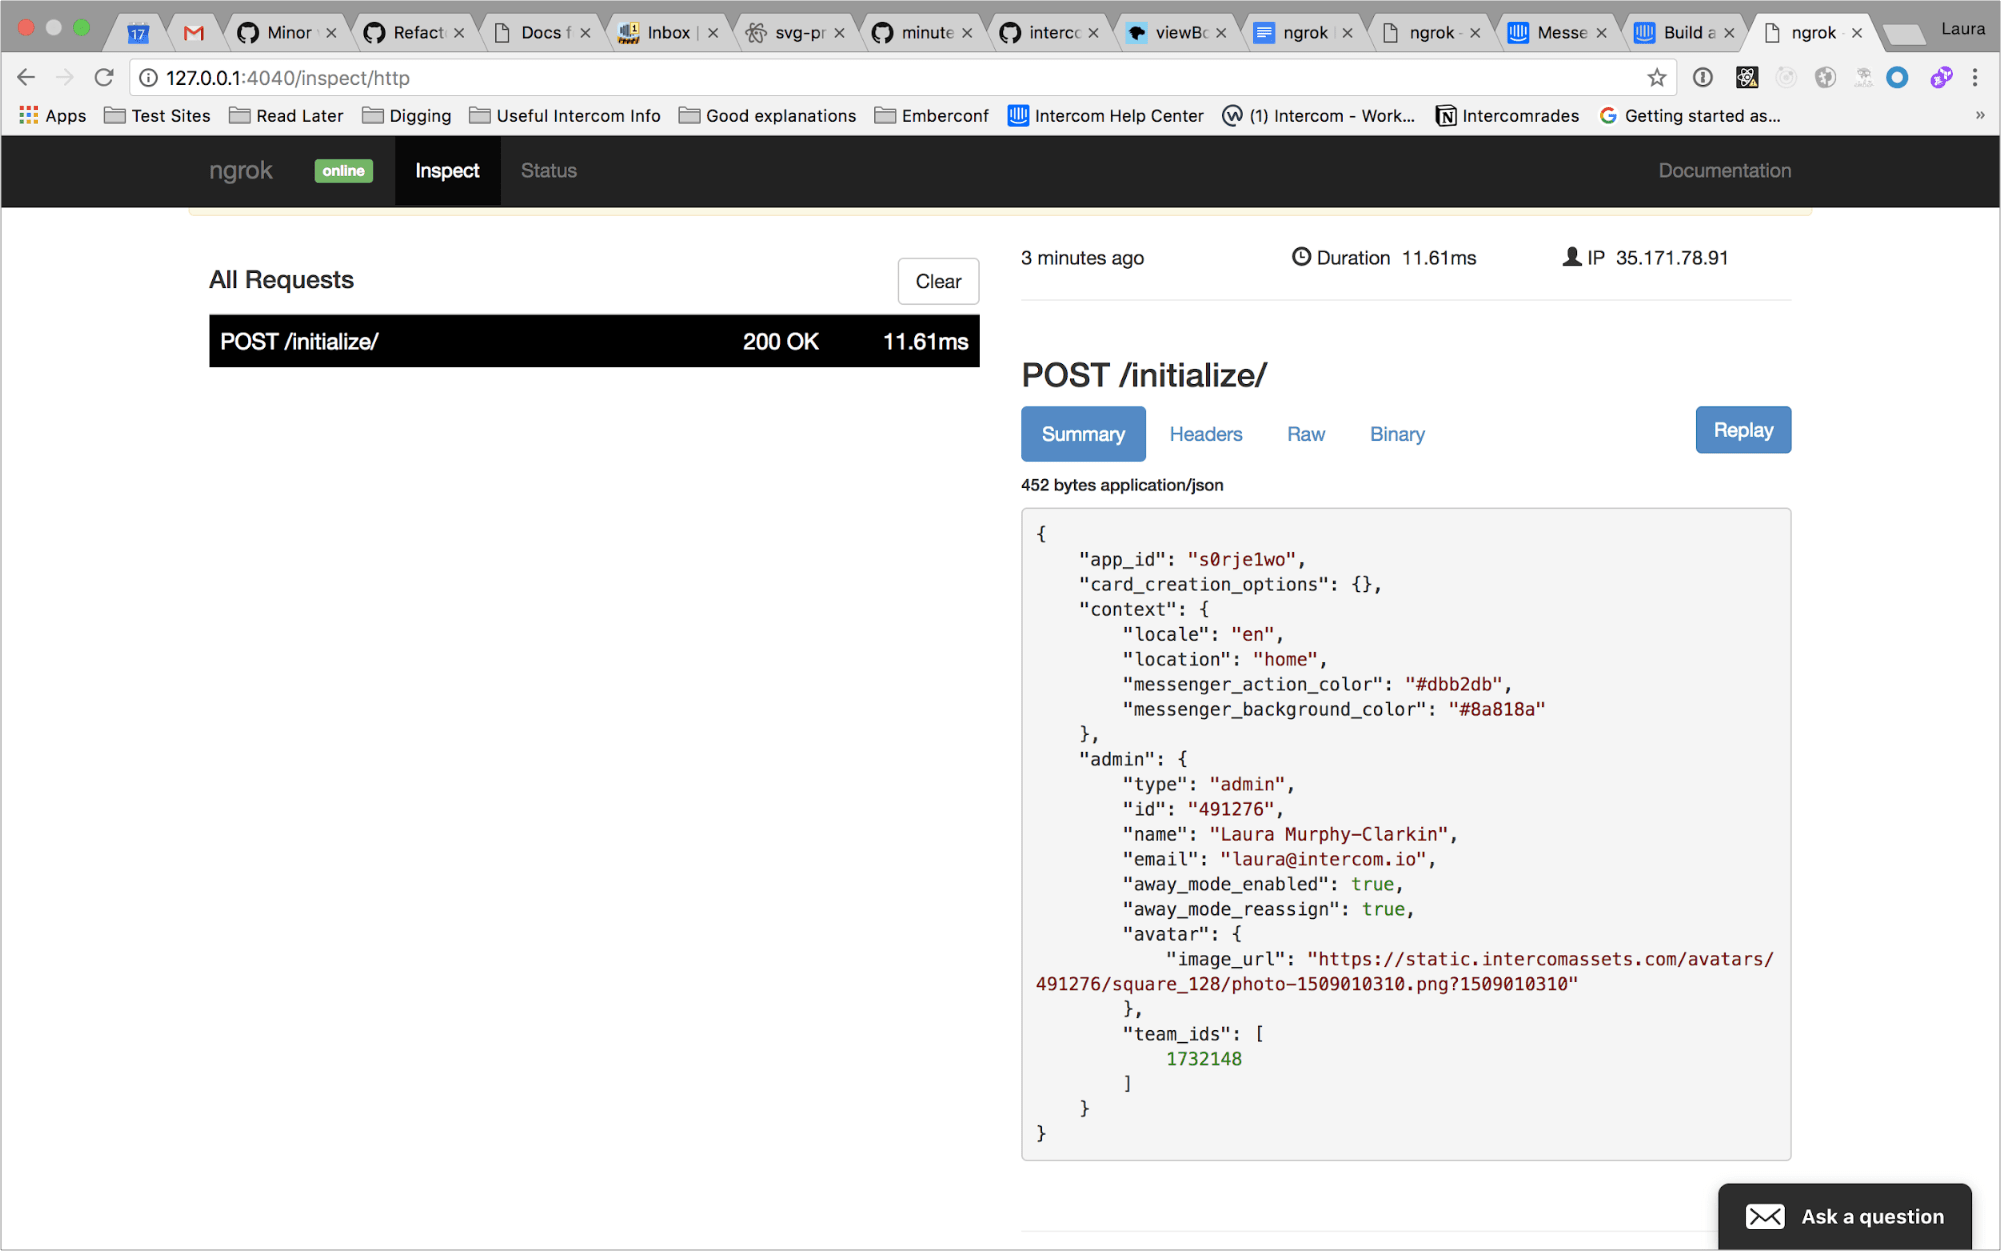
Let’s open the web interface. We can use it to inspect the traffic. You can see the request:
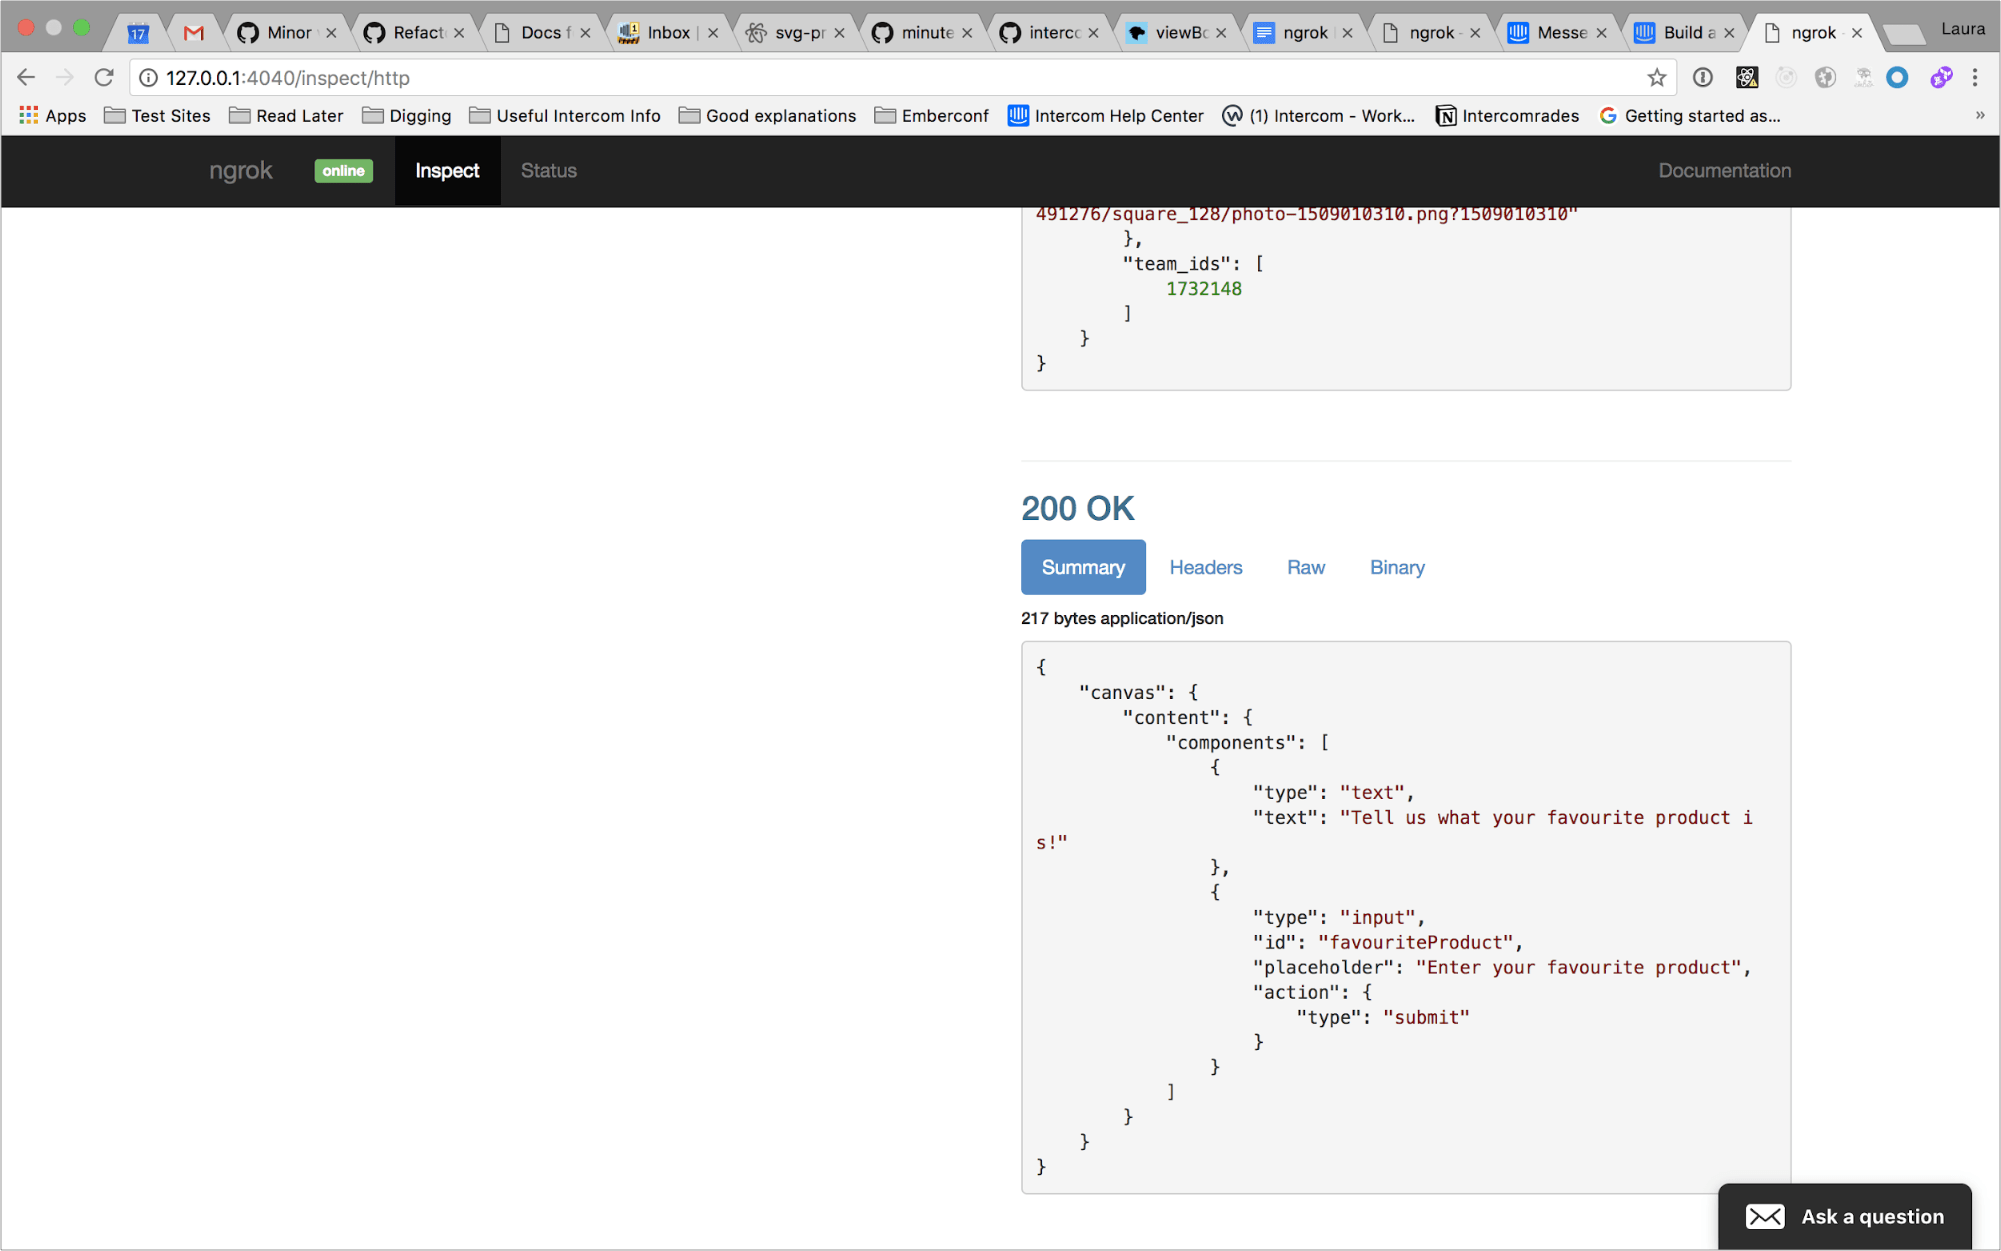
If you scroll down, you’ll see the response below the request:
2. Replaying Requests
You might notice the “Replay” button at the top of the request section:
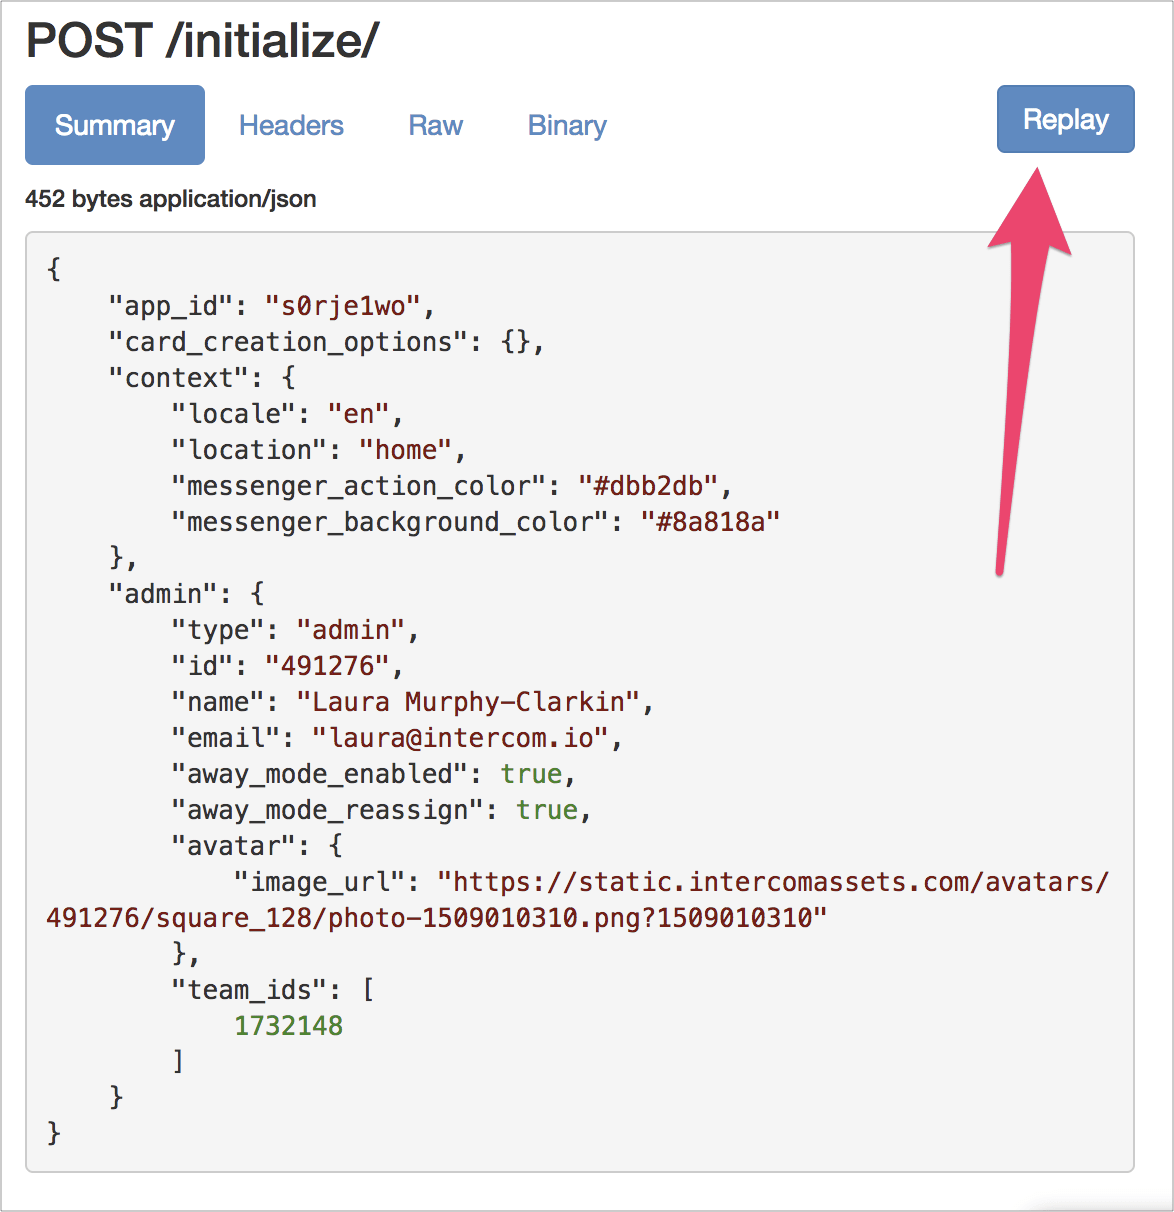
You can use this to replay the request so you don’t have to keep manually adding your app to Messenger Home in order to re-trigger the /initialize request. This ends up being a huge time saver.
3. Request and Response Validation
Another convenient feature of the web interface is the way it validates the body of the request and response. To demonstrate this, I’ve changed my server to return some badly formatted JSON for the /initialize request. I’ve replayed the request using the ngrok web interface.
Here’s the result:
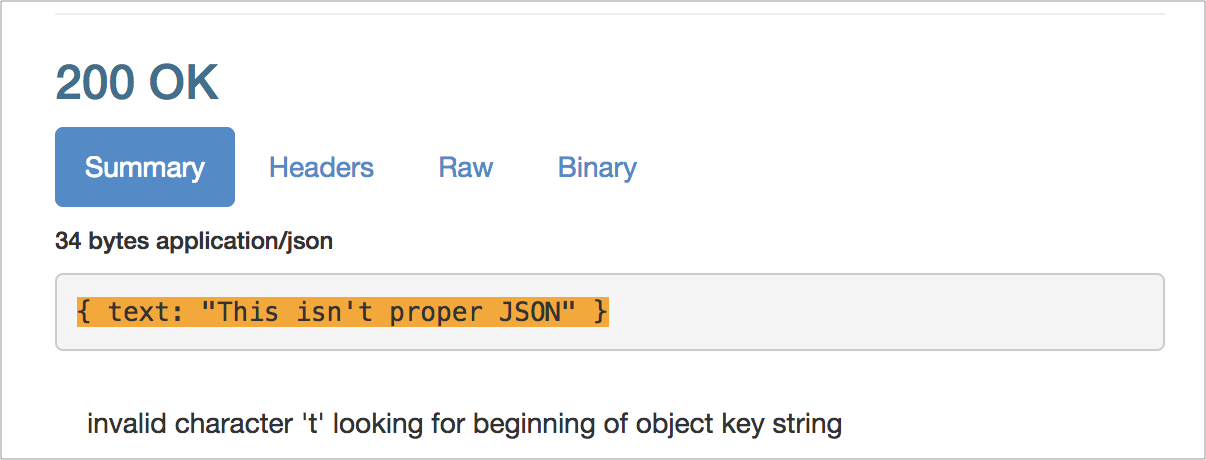
You can see that ngrok has highlighted the fact that this isn’t valid JSON – in this case, we’re missing quotes around the text key. This is obviously super useful for debugging your app as you develop it.
As you explore all the power and potential of Messenger Apps, you’ll find this tool invaluable – ngrok is fantastic and very easy to use (plus, the docs are great!). It can help you build an app in a matter of hours. If you’re looking for inspiration, check out the Intercom App Store to see what others are building. Or, if you want to get going right away, check out the docs on building apps.

